


Description:
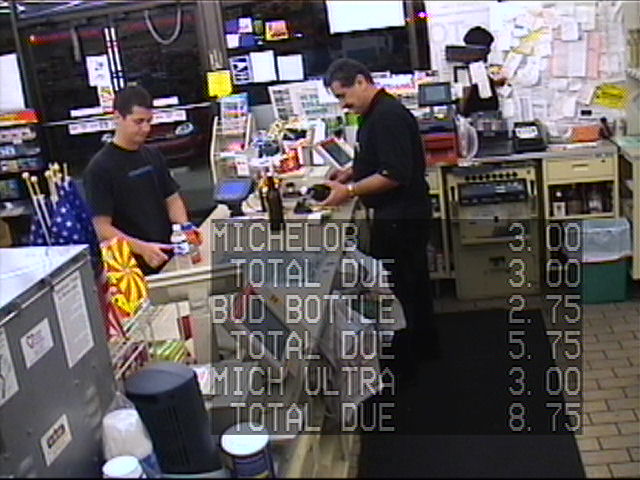
PostMark® interfaces point of sale terminals (POS) with security cameras to produce a continuous overlay of transactions superimposed on the camera video output. PostMark® can either interface between a point of sale terminal and pole display or work standalone connected to a point of sale terminal. The PostMark® is the ideal product for your cash register security and surveillance needs.
Intuitive Circuit's PostMark® uses video text inserter technology that allows it to easily integrate into an existing cash register surveillance system. A cash register surveillance or a video based cash register security system integrated with the PostMark® POS text inserter product allows security personnel to review and find specific recordings of a cash register transaction.
Our cash register surveillance product is compatible with many different types of cash registers, pole displays, and POS systems. Intuitive Circuit is the original designer, producer, and seller of this POS security product. We have over 10 years of engineering design experience in the video text inserter products business. You can view our other video text inserter products from our products page. If there is a cash register or POS system that you want supported please let us know.
Specifications:
PostMark® Supports the following cash registers and Point of Sale (POS) Systems:
Cash Registers
- Micros (Eclipse, Workstation 4)
- Ruby (Epson TM-U950 printer)
- Samsung
- Uniwell
POS Systems
- Aldelo for Restaurants 3.0
- Cash Register Express 2000 (CRE2000)
- ComCash
- Digital Dining
- Focus
- MicroPos
- PetroCan
- Pinnacle Palm POS
- VeriTouch
- Point of Success
- Pole Displays
- EMAX
- Epson
- IEE
- TAPS
- Ultimate PD2000
- Ultimate PD2000XL
Installation:
On the back of PostMark® there are five connectors (see figure 2.) Make the following hookups:
| Connector | Hookup |
| VIDEO IN (optional) |
|
| VIDEO OUT |
|
| REGISTER / PC |
|
| POLE DISPLAY (optional) |
|
| DC 8-14 V |
|
The PostMark® serial port must be configured to match the electrical configuration (pin out) of the point of sale terminal and optional pole display. This is done once per unit by setting jumpers on the circuit board. To open the enclosure remove the two back screws, remove the panel and bezel, and slide the circuit board out. Just below the DB-9 serial connectors are a column of 14 jumpers. For any installation, at minimum, the RX and GND jumpers must be installed.
Jumper Description Table:
| Jumper(s) | Description |
| P5, P9, P4, P8, P3, P7, P2, P6, P1 | These jumpers tie the REGISTER / PC connector pins to the POLE DISPLAY connector pins to allow the POS system RS-232 signals to pass-through to the pole display. |
| TX, RX, GND | These jumpers tie REGISTER / PC pins to the PostMark® circuit. TX is never used. |
| CTS | This jumper ties the REGISTER / PC RTS and CTS pins together. This may be required for some REGISTERS / PC's. |
| DCE | This jumper ties the REGISTER / PC DCE and DTE pins together. This may be required for some REGISTERS / PC's. |
Common Jumper Configurations:
| POS System / Pole Display | PostMark® Jumper Settings |
| Default POS system and no pole display | RX and GND |
| Default POS system and pole display | P5, P3, RX and GND |
| VersiTouch point of sale software Epson DM-D110 pole display(Configure VersiTouch, Epson DM-D110, and PostMark® for EMAX emulation) | P5, P3, RX, CTS, DCE, and GND |
Configuration:
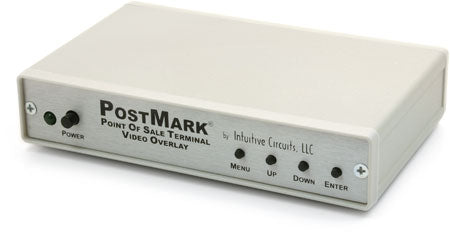
PostMark® configuration is performed through an on-screen menu system. At any time press the "MENU" button to enter the on-screen menu configuration. The "UP, DOWN, and ENTER" buttons move the cursor and change the values (see figure 1.). The on-screen configuration allows PostMark® to be tailored for the specific customer application. The on-screen text can be repositioned and the number of rows can be adjusted. The text can be made translucent (see-through) and have a background frame. The POS system and pole display RS-232 serial data format can be configured.Main Menu:
| Menu Option | Action |
| Set Screen Parameters | Displays Screen Parameters Menu |
| Set Pole Display Parameters | Displays Pole Display Parameters Menu |
| Save Changes and Exit | Save all the options that have been changed in non-volatile memory |
| Discard Changes and Exit | Discard all the option changes that have been made since entering the menus |
Screen Parameters Menu:
| Menu Option | Action |
| Screen Mode |
|
| Background Frame |
|
| Translucent Text |
|
| Manual Adjustment |
|
| Total Rows | The number of on-screen text rows that are displayed (1 - 11) |
| Horz Position |
|
| Vert Position |
|
| Exit to Main Menu | Exit to Main Menu |
Pole Display Parameters Menu:
| Menu Option | Action |
| Pole Display Rows | Number of pole display rows (1 - 4) |
| Pole Display Columns | Number of pole display columns (20) |
| Select Emulation Type | Displays the Select Emulation Type Menu. The selection from that menu will change the Start and End values. |
| Start | Select the start byte sequence the POS system will generate (values in decimal) |
| End | Select the end byte sequence the POS system will generate (values in decimal) |
| Exit to Main Menu | Exit to Main Menu |
Select Emulation Type Menu:
| Menu Option | Action |
| EMAX | EMAX pole display emulation |
| IEE | IEE pole display emulation |
| TAPS | TAPS pole display emulation |
| Ultimate PD2000 | Ultimate PD2000 pole display emulation |
| Ultimate PD2000XL | Ultimate PD2000XL pole display emulation |
| None | Do not change Start and End byte sequences |
Warranty & Service:
If the product fails to perform as described in our product description or specification, within 90 days from the date of shipment to the buyer, we will repair or replace the product and/or accessories originally supplied. Failure due to improper installation, misuse, abuse or accident is not covered by this warranty. Incidental and consequential damages are not covered by this warranty. The buyer must obtain a Return Material Authorization by calling (248) 248) 588-4400, and shipping the defective product to Intuitive Circuits, 3928 Wardlow Ct., Troy, MI 48083, freight prepaid. After the warranty expires, we will promptly supply an estimate for the repair cost.